Hey guys anyone know if the Gen3 has an oil filter for the auto box. I can only find reference to oil change in the manual, no mention of filter replacement.
Thanks WD
Hi Wilddog
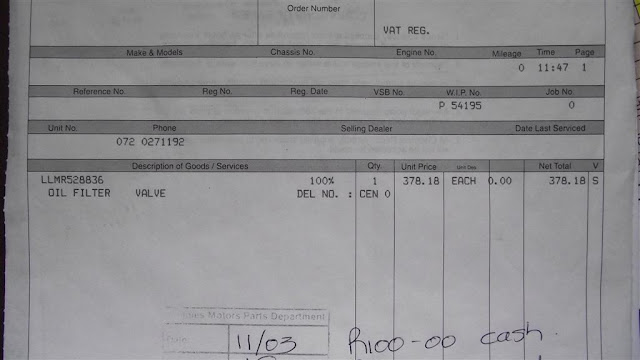
Yes it has an oil filter. Part number LMR528836, price R447.13.
AT fluid part number L4024610, price R257.80 excl for 4L.
I have inquired re the filter change and Mitsubishi say they don't change the filter, however, on a 10 year plus vehicle, I personally feel that the filter must have a finite lifespan, and have purchased with the intention of doing so.
According to other posts, be VERY carefull with the gearbox sump bolts as the aluminium is VERY soft. I have not yet done the job, and VERY nervous to do it...
Affiliate Member
https://www.pajeroclub.co.za/forum/viewtopic.php?t=2115
4ePikanini wrote:Get a filter from the dealer and get some gasket maker (high tolerance to oil and heat)
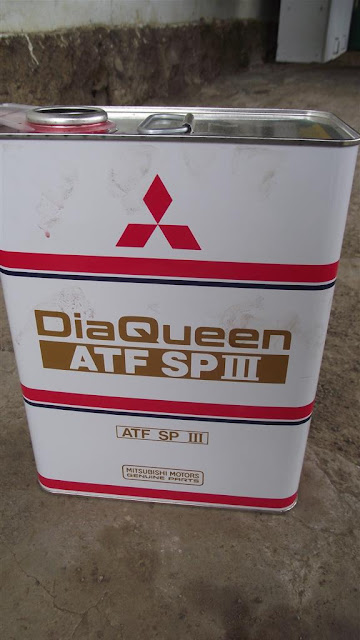
Get 3 x 4litres of DIA Queen SP III
Do the work on a windless day or inside garage as you do NOT want any dust or fluffy stuff getting into the tranny.
[ Image ]
[ Image ]
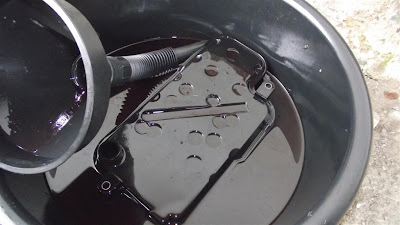
This what the old filter looked like with the brown old fluid
[ Image ]
remove the end of the pipe closest to you and aim it down into a bucket (crouch in front of the vehicle and look left and down) - it may be necessary to remove a bash plate in some cases.
[ Image ]
get a helper to start the car with the handbrake on, wheels bricked and the transmission in neutral while you aim that pipe into the bucket.
Tell him to kill the car as soon as the flow stops.
support the transmission with a jack under the dynamic damper (or close to where the rear driveshaft bolts to the transfer case)
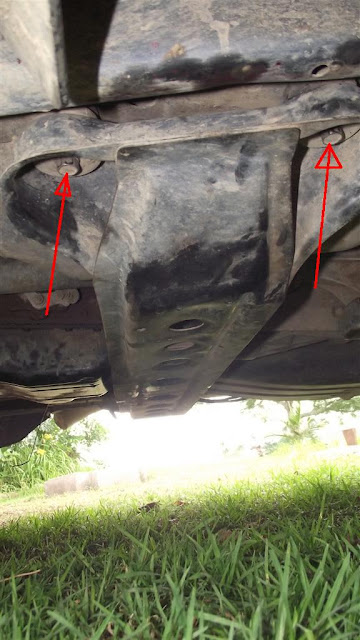
Remove the bash plate (6x 12mm bolts)
Use a 17 spanner and crack loose the transmission pan drain plug. Drain all the oil.
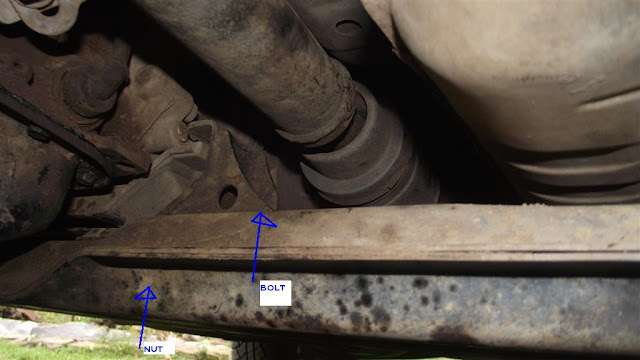
Using 14 spanner, socket and medium extension undo the crossmember (6 bolts & 2 nuts in total)- some people claim to have done this job without this step but it's so easy te remove and gives great access.
[ Image ]
[ Image ]
[ Image ]
I now used some engine cleaner and thoroughly cleaned around the area of the transmission pan.
Use a 10mm socket and extension and undo all the transmission pan bolts.
Very very VERY VERY carefully use a soft wedge and drive it in to remove the pan from the transmission.
Take NOTE not to lose the o-ring that seals the dipstick tube.
NOTE : The transmission is made of extremely soft aluminium
clean your tools and and hands before remove the 2 bolts holding the tranny filter in. A bit of wiggling will now give it up free of the tranny.
use some new oil and lube up the o-ring on the new filter and bolt it in - DO NOT over tighten the aluminium is EXTREMELY soft - the repair manual specifies something like 11NM.
Clean the pan extremely well and use the oppurtunity to clean the magnets in the pan - if you haven't got any, now is the time to get some. If yours has magnets and there is excessive fillings on the magnets it may be worth taking a macro picture with reference (ruler will do great) and show to tranny specialist for advice on impending danger.
clean both gasket surfaces but be carefull not to scratch or damage. Make sure it is completely oil and grease free before laying your gasket maker as prescribed and offering it up to the mating surface. A helper that can get a few bolts started is useful here. Take note of the dipstick funnel and make sure the o-ring seats nicely - prelube with oil helps a lot.
I only tightened softly with fingers and allowed a few minutes before I tightened tighter by hand screwdriver with 10mm socket attached. I then waited 60 minutes and gave a final small turn with a small socket and ratchet.
AGAIN BE CAREFUL : The manual specifies 11NM torque as the aluminium is extremely soft.
I allowed overnight to dry as I wanted to make sure it sets correctly.
Put the pan drain bolt back if you haven't done so already.
Fill with about 6 litres of fluid through the dipstick with a funnel.
Start the car in neutral again while holding the hose at the front of the car aimed at a bucket. Don't be alarmed if no fluid comes out immediately. A bright backdrop will help look at the colour of the oil.
As soon as you can see reasonable coloured red fluid come through yell at the driver to kill the engine.
connect the pipe back up again and fill the tranny bit by bit through the funnel. check the dipstick often. As soon as the level shows on the dipstick, start the car for 20 seconds in neutral and check again. Fill up to between the cold and hot mark.
[ Image ]
[ Image ]
Bolt the crossmember back again. I bolted the centre bits first and then used the jack to get the outside ones in.
remove the supporting jack.
Go for a very short drive, check for leaks and check the level again
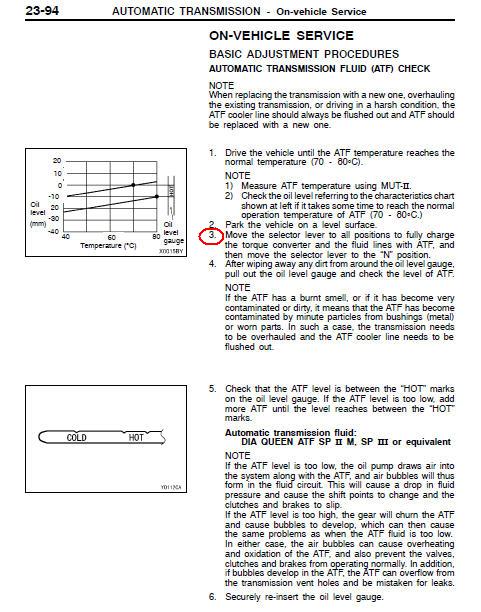
NOTE : The level must be checked while car is parked on level surface. It must be idling and the box in neutral.
- move the lever through the different places while pausing at each to get the oil flowing through all the areas and get the air out.
If you are happy with the level and that there are no leaks go for a longer drive and come back. If the gearbox feels hot underneath check that the dipstick level now shows at the hot mark (manual states 70-80 degrees celsius).
keep checking the level for the next few days and any signs of leakage. Replace bash plates when you feel you are happy with the job and no leaks are showing.
The whole thing is not too difficult but a bit of a faff. If you work slow, systematic and organised it's not too bad.
Thanks for that Marius, Do you have a link to the original post? The pictures are not showing in this post and I wish to print it
WD
WD
Affiliate Member
https://www.pajeroclub.co.za/forum/viewtopic.php?t=2115Wilddog wrote:Thanks for that Marius, Do you have a link to the original post? The pictures are not showing in this post and I wish to print it
WD
Awesome post 4ePikkanini.
I also performed this service using your guide, and all hopefully went well.
Unfortunately for me, the wind came up a bit and I wrapped a towel around the open box, and I was working outside on the ground. Hopefully all is good, and the car does drive ok...
I also performed this service using your guide, and all hopefully went well.
Unfortunately for me, the wind came up a bit and I wrapped a towel around the open box, and I was working outside on the ground. Hopefully all is good, and the car does drive ok...